Transcribing voice memos locally in 2026 (on Windows or Mac)
German translation: 🇩🇪 Sprachmemos lokal transkribieren (in Windows oder MacOS)
How to reliably convert voice recordings into text locally – no cloud, no accounts, no complicated set-up.
Content
Recommendation
For transcribing occasional voice memos on Windows, I recommend Buzz – but only within a clearly defined workflow:
- Record the entire voice memo using Windows Sound Recorder or another recording app.
- Stop recording.
- Drag and drop the finished audio file into Buzz.
- Confirm the language and model selection.
- Transcription starts and the text file is then saved alongside the audio file.
Download:
Windows users should download the “Windows-X64” file:
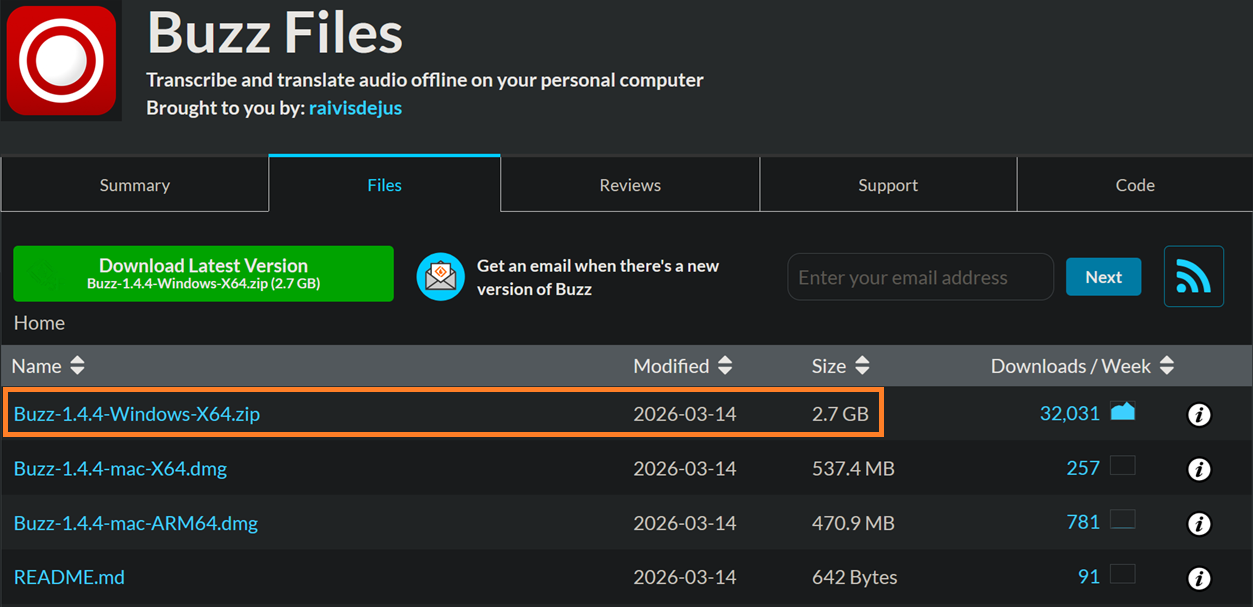
Also available for Mac.
Please note: I would currently advise against using Buzz’s built-in live recording and automatic folder monitoring features. Both functions have conceptional issues for which I don’t see an immediate solution. Details on this further down below.
While Buzz may not be the ultimate all-in-one solution, its user-friendly interface and minimal number of setup steps make it a convenient tool for local transcription of finished audio files.
But first, let’s cover a few basics:
Speech recognition isn’t exactly new now, is it?
Actually, it is. It is only recently that speech recognition has become possible with a usable degree of accuracy – the solution is a by-product of the general LLM revolution.
Earlier, deterministic methods were extremely prone to errors, particularly with foreign words, technical terms, unstructured speech, dialects, and so on. These historical methods are now completely obsolete thanks to LLMs.
The release of Whisper (2023) changed everything. Speech recognition is now reliable: audio in, text out.
However, we do not want to process our audio recordings on third-party servers – after all, they often contain personal, confidential or business content that does not belong on the internet.
This article therefore focuses exclusively on local transcription:
The audio file remains on your own computer. The speech recognition model is downloaded once and then run locally.
The foundation: Whisper
Whisper is a model for automatic speech recognition published by OpenAI. It recognises the spoken word, can seamlessly distinguish between different languages, and handles grammar and punctuation flawlessly. The interpreter and its model weights are licensed under an open-source licence and can therefore be used entirely locally and free-of-charge.
Whisper is not a single piece of software. It is, first and foremost, a speech recognition model – essentially a library that can be integrated into other programs.
The model is available in various versions, such as:
- Whisper Tiny, Base, Small, Medium and Large
- Whisper Large-v2 and Large-v3
- Whisper Large-v3-Turbo
- Faster-Whisper
- Distil-Whisper
- Whisper.cpp
These models differ in terms of file size, memory usage, processing time, multilingual support and error tolerance. If given the choice, I would generally lean towards ‘Large’ or ‘Large Turbo’.
Additional variants such as Faster-Whisper or Whisper.cpp primarily refer to different technical implementations. Whisper.cpp is required, for example, for acceleration on AMD graphics cards (via Vulkan), as the “standard” models only work on CPUs or NVIDIA hardware (via CUDA).
In addition, there are competing models from other providers that have further developed the concept established by Whisper. These include:
- NVIDIA Parakeet and Canary
- Qwen3-ASR
- SenseVoice
- Mistral Voxtral
- Microsoft VibeVoice-ASR
- Meta Omnilingual ASR
However, these are more commonly found in professional software or in research and development. The user-friendly Buzz software, which I recommend, offers ‘only’ the Whisper models – but these seem to be more than sufficient for everyday use.
My search criteria: keep it simple
I was looking for an application that meets the following requirements:
- an intuitive interface for users with no technical experience,
- fully local processing,
- easy import of ready-made audio files,
- reliable output as plain text,
- a sensible choice of models from small to large,
- the ability to run on CPU-only systems,
- acceleration via NVIDIA, AMD or Intel graphics, where available,
- visible progress indicators during model downloads and transcription jobs,
- as little additional setup as possible.
It was surprisingly difficult at first to find a combination of ease of use and broad model and hardware support.
The actual speech recognition isn’t the problem. With the right workflow, the results are always very good – the reliability, even with imprecise, mumbled or dialect-spoken language, is truly astonishing. Even unusual brand names or the mixing of languages (such as the use of Anglicisms in German) is recognised and transcribed with ease.
The problems tend to revolve around setup, operation or ambiguities regarding the primary intended use. As we’re making a conscious decision to use open-source software (local, free, no hidden catch), we find ourselves in the realm of hobbyist developers, with sometimes a few rough edges around UX and UI.
Many projects derived from Whisper that you find online fall into one of these categories:
- technically powerful, but only operable via the command line;
- attractive interface, but only a few models to choose from;
- comprehensive server/client solutions with Docker, running on WSL (Windows Subsystem for Linux);
- applications that look free-of-charge at first but that ultimately want to nudge you towards a cloud subscription;
- real-time dictation programmes with an overabundance of features and a confusing user interface.
My current recommendation: Buzz
Buzz is an open-source desktop application that transcribes audio and video files locally. It supports multiple Whisper backends, TXT, SRT and VTT output, as well as both NVIDIA CUDA and Vulkan via Whisper.cpp.
The interface is relatively simple:
- Drag and drop a file,
- select a language,
- select a model,
- start transcription.
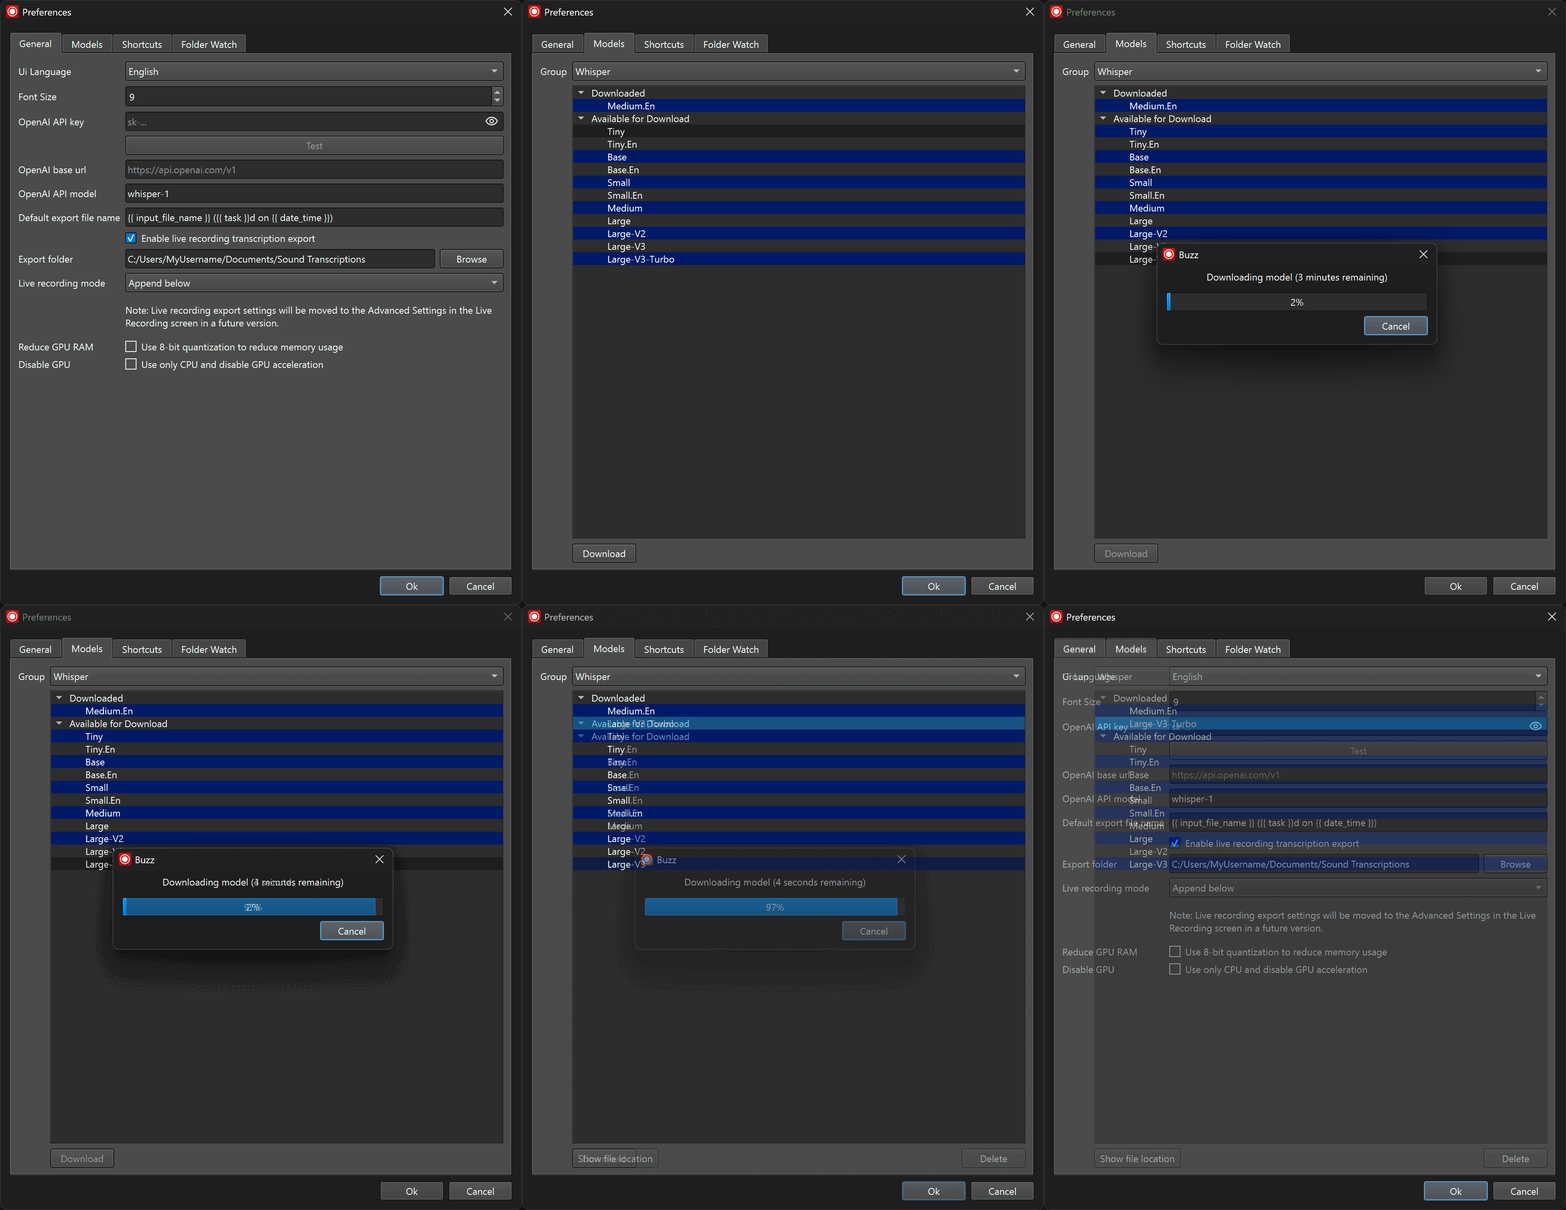
There’s no need to set up Docker, WSL or any local server. Everything just works out of the box. Here’s the settings dialogue:
And a demo video:
For me, as someone who simply wants to convert voice memos into text, it works perfectly.
However, in my opinion, Buzz is only sufficiently reliable if you limit yourself to transcribing files that have already been recorded.
Recommended workflow
1. Create a recording
First, record the voice memo in full using a separate recording app, such as Windows Sound Recorder.
2. Import the finished file
Once the recording is complete, drag the audio file directly from File Explorer into the Buzz window.
3. Set the language
Select the spoken language manually where possible; this improves the accuracy of the transcription, particularly with smaller models. Occasional foreign words in the flow of speech are not a problem – they are recognised correctly. However, if the spoken languages in the recording are mixed throughout, it’s better to leave it set to “Detect Language” (auto-detection).
4. Select a model
As a starting point, I’d recommend:
- Small or Medium for testing, or if the recording is extremely long and accuracy is less important;
- Large-v3-Turbo as the standard recommendation, particularly on moderately powerful hardware.
As we’re not doing real-time transcription here (we’re transcribing finished recordings for later use), you can safely accept the longer compute time of larger models and just do something else while it is running. I’d therefore generally tend to recommend the slightly larger models.
Models with the suffix .en should only be used for English recordings.
5. Do we need to proofread the output? It depends.
Whether you want to check the transcript for errors depends on your intended use:
Do you want to share or publish the text in any form? If so, read it through carefully, paying particular attention to:
- names,
- technical terms,
- numbers,
- abbreviations,
- foreign-language words,
- and indistinctly spoken sentence endings.
If, on the other hand, the text is merely a prompt for the next LLM action? Then precision is less important. The LLM will sort out any misunderstandings itself. Fire & forget!
Text or SRT file?
For a standard voice memo, saving the output as a text file is generally the most sensible choice. It simply contains the recognised text, without any frills or metadata.
SRT is a subtitle format (similar to VTT and ASS): the text is divided into individual sections, and each section contains timestamps that specify when it should appear in a video. This is useful if you want to subtitle films, TV series, interviews or other audiovisual content – though for that, I would recommend other software specifically designed for subtitles, such as SubtitleEdit.
After all, subtitling is very much about timing – which sentences belong together, how tight the timing should be whilst still remaining as legible as possible, and so on – it’s a craft in its own right and something of an art form. SubtitleEdit offers countless helpful features for this and comes with a locally running speech recognition backend.
For a simple voice memo, subtitles and timestamps are unnecessary clutter. For the purpose of this article, my standard output in Buzz is a plain text file (.TXT).
Features I do *not* recommend
Little more than a gimmick: Live Recording
Buzz can record directly via a microphone and transcribe simultaneously. However, I encountered some fundamental issues with this during my tests:
- The first few words are lost while the model is still loading.
- When the recording is stopped, any unprocessed audio is apparently discarded. As a result, entire sentences are sometimes missing at the end.
- Pauses and background noise are much more likely to cause ‘hallucinations’ than with a complete audio file, because the model has far less context during a live recording and is, so to speak, constantly under pressure to keep up.
In practice, you’d have to wait in silence after the last spoken sentence until the text output has caught up, and only then press ‘Stop’. That’s not a sensible workflow for me. Similar problems also arose with other programs I tested that had a live function.
I would therefore always keep “recording” and “transcription” as separate. One tool for one job.
Prone to errors: Folder Watch
Folder Watch is designed to automatically transcribe audio files as soon as they appear in a specific directory. I wouldn’t use this function at the moment either.
My tests revealed, amongst other things:
- The Windows Sound Recorder creates its audio file already while the recording is still in progress. If you define Sound Recorder’s output folder as a “Watch Folder”, Buzz immediately starts processing an incomplete recording. Other recording programs may behave in a similar way.
- Subfolders within the Watch Folder are included recursively. If you define the transcription output folder as a subfolder of the recording folder, Buzz, moving the audio file to the output folder together with the transcript, will trigger repeated processing and an ever-deeper nesting of directories. In my tests, this eventually resulted in a reproducible crash.
- Buzz does not use hash sums to differentiate between files with identical filenames. Thus, Buzz will ignore new recordings in the watch folder if they have the same filename as previous recordings.
Automatic folder monitoring sounds convenient, but it still requires manual steps to avoid running into problems. In that case, you might as well skip it altogether and simply drag the audio file into the Buzz window yourself.
(I have already opened corresponding issue reports on Buzz’s GitHub.)
Alternative: TranscriptionSuite
TranscriptionSuite takes a technically complex, more modular approach. It integrates various speech recognition models as separate Docker containers, thereby establishing a clearly separated, local server-client structure.
However, for a simple in-house standard solution, I find the setup too cumbersome at the moment:
- Docker Desktop and WSL must be installed manually via PowerShell (before or after installing TranscriptionSuite).
- Selected models are only downloaded when the server starts. You can not download or manage models when the server is not running.
There were also issues with usability and functionality:
- When inserting a file, there is no visual feedback to indicate that the file has been successfully uploaded. You have to scroll down to find it in the batch list, which is suspiciously far removed from the import button.
- There are no progress bars for model downloads or file processing.
- Exporting as a .TXT file did not work in my tests – only export as an .SRT file, even when .TXT was explicitly selected.
The UI design and underlying architecture of TranscriptionSuite are neat, but the user experience and workflows still need a bit of work. Therefore, for the foreseeable future, my recommendation remains Buzz, which is easier and more consistent to use.
(I’ve also submitted issues here: TranscriptionSuite on GitHub)
Voice memos as raw material for further work
For me, a transcription is usually not an end product, but merely an intermediate step. A voice memo often serves as a ‘brain dump’ for me, from which I later create a summary, minutes, work instructions, a draft article or a detailed prompt. I already type relatively quickly, but I can still speak much faster than I can type. Furthermore, speaking freely often gives rise to different thoughts than writing does: connections are formulated more spontaneously, errors are immediately apparent, and – particularly when tired – it is often easier to voice a thought than to put it neatly into written form.
This is particularly helpful when working with LLMs and autonomous, agentic systems. The more precisely a task is described and the more relevant context is provided, the better the result will be without having to constantly iterate toward the actual goal.
Voice memos, in a sense, broaden the link of human-machine communication: in the same amount of time, more thoughts, examples and background information (more bits per second) can be transferred from one’s own mind into a usable form.
The same applies, of course, to communication with other people: perhaps sometimes just pick up the telephone…
Which LLM is used subsequently, and whether that further processing takes place locally or in the cloud, is not the subject of this article.
Why record first, then transcribe?
Many LLM web services and apps offer their own microphone button. These do not produce live transcripts – these functions will also wait until you finished your recording before they begin transcribing.

Nevertheless, for long takes, I strongly advocate to separate recording and processing into separate apps:
- one tool for recording,
- another for transcription
- and perhaps a third for putting the transcript into work.
One tool for each job.
The most important reason is reliability. Particularly with longer recordings, it’s quite possible for web applications to crash, sessions to time out, uploads to fail or processing to end without a usable result. The internet… it’s complicated.
There’s hardly anything more frustrating than speaking into the microphone for ages only to realise afterwards that nothing has happened. No recording, no transcript – just a spinning wheel that never stops. That’s why, after every recording, I want to first have a standard audio file on my hard drive. The spoken word is what counts (and it’s stored locally as a waveform file).
If, later on in the second step, the transcription fails (wrong model or language selected? RAM overloaded? Power cut?), I still have my original recording and can try transcribing it a second time.
This separation also makes sense from a data protection perspective. There’s a difference between a cloud service receiving your own voice as a complete audio file and simply receiving the text that’s already been generated locally. A transcript may well contain confidential content too, but the audio file additionally contains your voice, manner of speaking and background noise – things you might just not want to put into the cloud.
My preferred workflow is therefore: record locally, transcribe locally, and only then make a conscious decision as to whether and where the text should be processed further.
Separating the recording from the transcription also allows me to conveniently record audio on my mobile phone using a headset, whilst walking around if necessary (keeping body and mind active), and then transfer the file from my phone to my computer to continue working on it there.

Every Android and iPhone has a pre-installed, local audio recording app. Transferring the audio file (MP3 or M4A) to the computer is then easily done via LocalSend, which is also open source (Windows, Linux, Mac, iOS, Android).
Speaker recognition for interviews and meetings
For interviews or meetings, a mere transcription of the spoken words is not enough: the application must also recognise who spoke at what point, so that individual statements aren’t taken out of context.
This process is known as “speaker diarisation“. The result then includes labels such as “Speaker 1” and “Speaker 2”.
Buzz supports this speaker separation – although the feature is somewhat hidden. First, the standard transcription must be fully completed. You then double-click the finished file in Buzz’s overview window to open the transcript, then select “Identify speakers”.
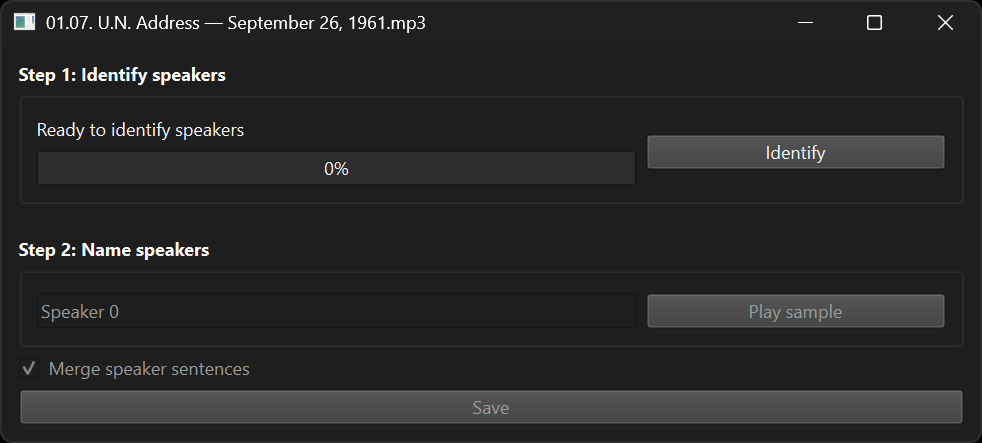
Speaker identification then runs as an additional processing step and consequently requires further time and computing power. The function identifies speech segments, groups voices based on their characteristics, and then links this information to the transcript’s timestamps.
Buzz’s user interface currently does not offer the option to already queue this step upon initial file import.
Technically, this function is based on the established open-source project Whisper-Diarization, which in turn uses NVIDIA NeMo for speaker recognition. This pipeline is considered robust, but can sometimes mess up a bit with fuzzy recordings (where several speakers talk over one another or interrupt each other). Quote from the GitHub page:
Overlapping speakers have yet to be addressed; a possible approach would be to split the audio file and isolate a single speaker, then feed that into the pipeline, but this will require significantly more processing power
Despite utilising NVIDIA NeMo, the feature can be run entirely on the CPU if no NVIDIA graphics card is available. More information on hardware acceleration is provided in the next section below.
The more furnished solution mentioned above, “TranscriptionSuite“, uses a different pipeline for speaker recognition, called “PyAnnote Community-1“. This newer pipeline has been specifically developed for challenging recordings with multiple speakers and should improve speaker attribution in more complex meetings. To set up this pipeline in TranscriptionSuite, you need a free HuggingFace account. After registering, you generate a personal access token there and enter it once in TranscriptionSuite. In doing so, you simultaneously agree to the community project’s terms of use. Only then can the relevant model be downloaded within TranscriptionSuite. The processing itself continues to take place entirely locally.
Whether you need the additional precision offered by “PyAnnote Community-1” in TranscriptionSuite depends on the purpose. For an interview that is to be published, archived or used as a reliable verbatim transcript, you will want the highest possible precision and should check the result carefully. If, on the other hand, you want an LLM to simply generate a summary, a to-do list or rough minutes from an internal meeting, individual misattributed sentences won’t be that critical – as long as the overall content is preserved. You will probably want to proofread and supplement such a summary anyway after its generation.
Do I need a GPU for speech recognition? Nice to have, but not essential.
Modern speech recognition (like all LLM applications) consists of a vast number of simple arithmetic operations that can be carried out simultaneously. This is exactly what graphics cards (graphics processing units, GPUs) are built for: originally designed to process millions of pixels in parallel, they are equally well suited to process Large Language Models, commonly referred to as ‘AI’.
The GPU ‘understands’ neither language nor sound. It merely speeds up the math behind the model. A CPU (central processing unit, or simply ‘processor’) can also handle the same task, but works significantly slower because it is designed more for a few complex tasks rather than a large number of parallel calculations. Reliability and precision however are the same – only the execution time differs.
Acceleration via NVIDIA CUDA is particularly widespread. In addition, there are also Vulkan, DirectML, ROCm and OpenVINO to support AMD or Intel graphics as well. Which of these actually works always depends on the specific software, the model being used and its technical backend. Generally speaking, however, a CPU always works, and acceleration via NVIDIA also works almost always, and out-of-the-box.
So, if you have an NVIDIA card in your system, you should check the Task Manager while transcribing to see if the graphics card is being utilised during the process. Screenshot:
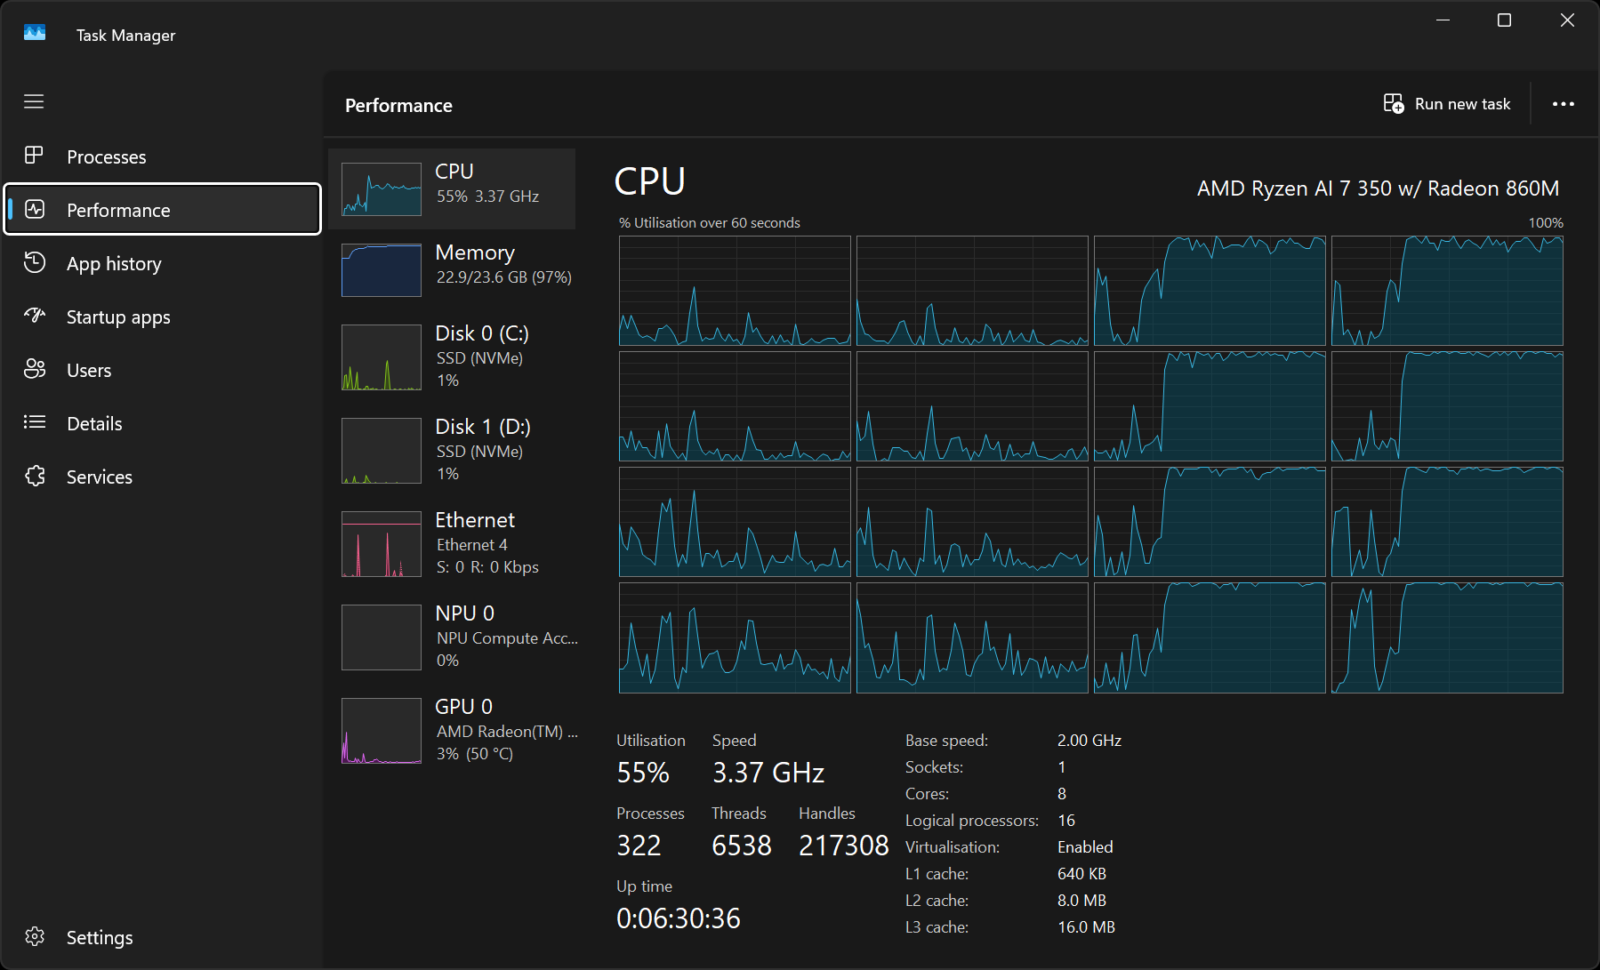
In my case, a full eight out of 16 CPU threads are being fully utilised here during transcription (apparently the model does not support hyperthreading or SMT). I currently don’t have any NVIDIA GPU in my system. If you have one, you’ll find it in this list and you’ll be able to monitor its utilisation.
Replying to emails and chat messages directly with voice?
Given the high reliability of modern speech recognition, do we even need to reach for the keyboard to reply to emails or chat messages anymore?
It’s an attractive proposition. However, I see two fundamental problems here:
With real-time transcription, the text is supposed to appear on the screen as close as possible to the spoken words. The software must therefore begin processing even before the sentence has been spoken in full. This means there is less linguistic context available compared to processing a finished recording retrospectively. This real-time approach will increase the likelihood of errors. Perhaps we would need to get rid of the idea of real-time output – it’s only a distraction and reduces the quality of the transcription.
Furthermore, spoken language is shaped differently than written language. When speaking freely, there are pauses for thought, repetitions, unfinished sentence beginnings, filler sounds such as ‘um’, subsequent corrections and mental digressions. A verbatim transcript will initially capture all of this. For it to become a message that sounds like a deliberate reply, the text must subsequently be smoothed out, shortened, restructured. If you do all this manually after recording, you don’t save any time – in which case you might as well have written the sentence yourself in the first place.
Buzz and similar programs with a ‘Live’ function (such as the paid-for SpeechPulse) can integrate an additional LLM for post-processing. Such a ‘general-purpose’ LLM differs massively from a transcription model like ‘Whisper’ in terms of its training data. To put it very simply: transcription models simply listen, whereas ‘general-purpose’ LLMs will ‘think’ and contextualise content using work instructions, available tools and the general knowledge acquired through training. Such LLMs are consequently much larger and require more computing power and RAM. The sky is the limit!
So if you want to reply to emails and chat messages ‘hands-free’, without having to restrict yourself too much when speaking (it’s hard to speak like it’s meant to be printed), you need this additional editorial step: the LLM decides which repetitions to remove, which sentences to combine and which phrasing to refine. This can work, but it also carries the risk that nuances in the message and the preservation of your personal style may suffer as a result.
To compensate, the LLM will need even more context: what is the email about? What is the tone? Which grammatical and typographical conventions should be applied? Do you want to be able to supplement the output with a second voice message – again without touching the keyboard? The required complexity quickly snowballs into a much more ambitious human-computer interaction problem.
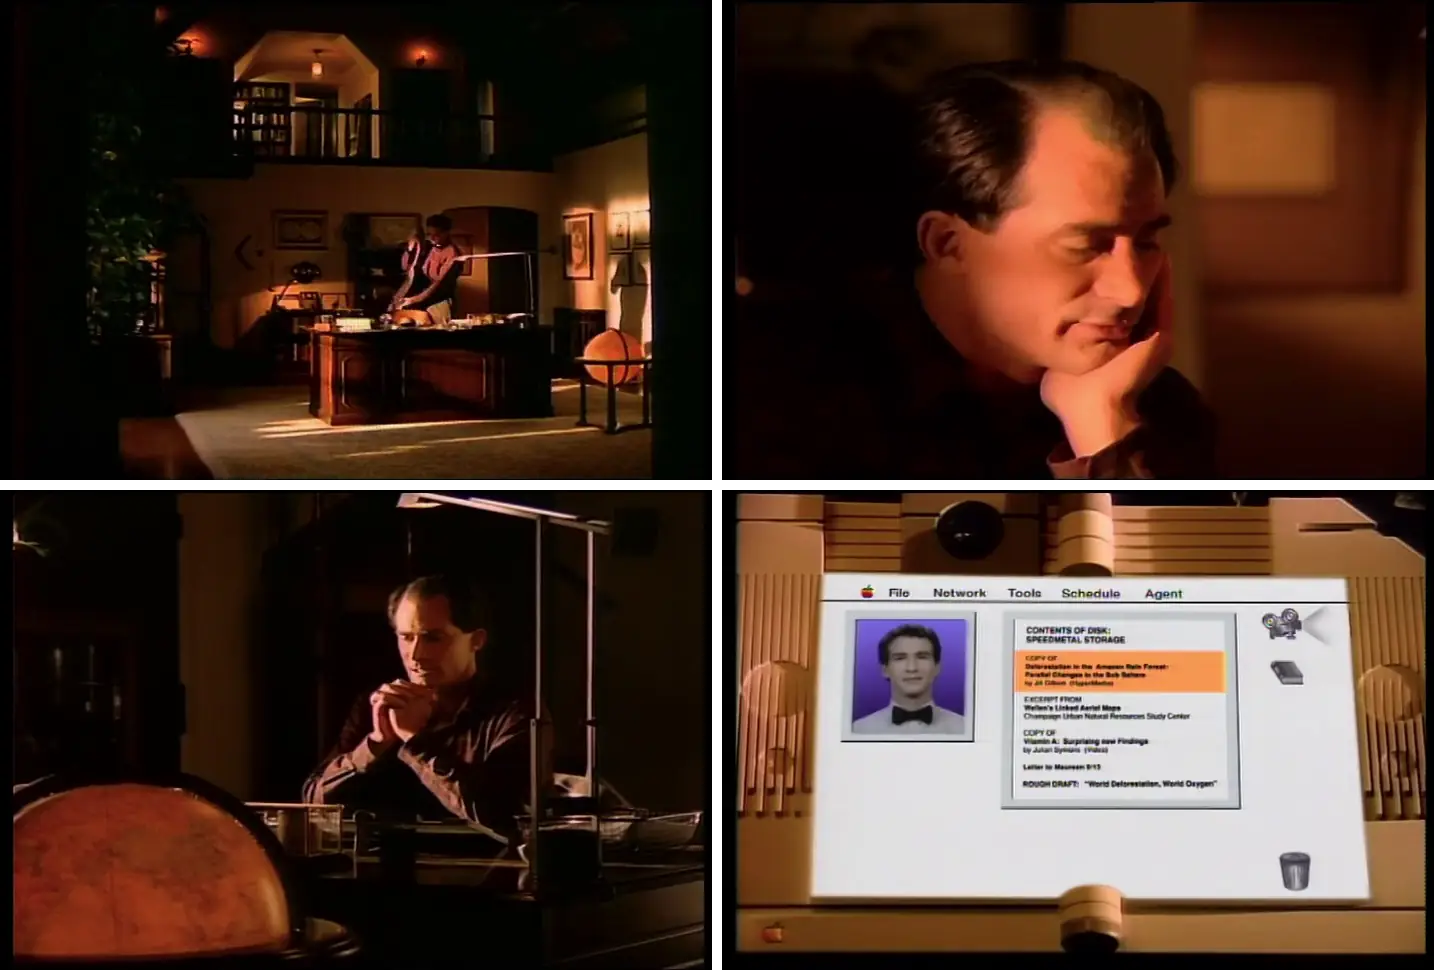
This is certainly an exciting and solvable issue, but it is beyond the scope of this article. You’ll also need more powerful hardware (with a dedicated graphics card) to ensure everything runs reasonably smoothly without lag. I’ll try to address this topic at a later date.
Final thoughts
Buzz is my recommendation if you’re focusing on the most basic, reliable use case:
Record a voice memo externally, stop the recording, drag and drop the finished file into Buzz, and transcribe it locally as text.
In this context, Buzz is simple, straightforward and works well even on basic computers without hardware acceleration. I would, however, stay away from real-time transcription and the folder monitoring feature – they’re too prone to errors.
More technically involved solutions such as TranscriptionSuite offer a wider range of models and features, but also require more set-up time and prior knowledge.
Article to be updated as soon as substantial changes to my own workflow arise.
Last updated: July 2026
This article is licensed under CC BY. 
If this article was helpful to you, please consider to buy me a coffee.
See also: contact information.